Caterpillar Races

By: Caroline Thrasher and Diana Sanchez
Suggested for all ages (with grown up help for early learners, kindergarten age, and younger). This is an easy, quick craft for any age and great for families.
Spring and summer are butterfly season, so now is the perfect time to make your own caterpillar! Caterpillars come in lots of different shapes, sizes, and colors, but one thing they all have in common is that they have to be able to move around! Caterpillars are on the move looking for food, water, and shelter (to stay safe!).
Using just a few materials, follow along with us to make your very own caterpillar. Then, race yours against your family or friends!
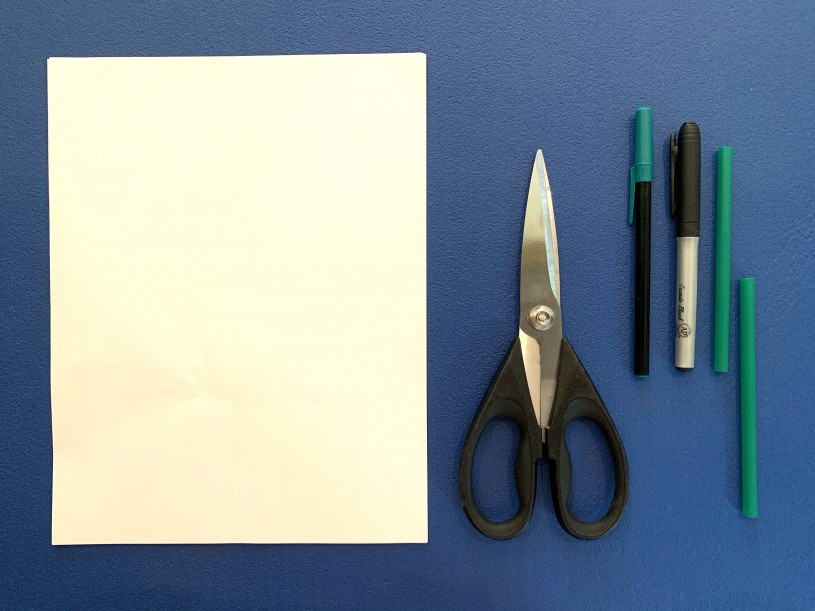
List of Materials
- Paper: any kind of paper will work.
- With a standard 8.5’’ by 11’’ piece of paper you can make 6 caterpillars.
- Scissors
- Marker, pen, or pencil
- Straw
- Additional materials: anything you have at home that you want to use to decorate your caterpillars! You could use markers or crayons to draw on your caterpillar, you could use paint or add stickers, or you can leave your caterpillar the color of your paper, it’s totally up to you.
Step by Step Instructions (how-to)
1. The first thing you’ll need to do is collect your materials. For this craft you will need:
- A piece of paper. Any kind of paper will work: white, colored, patterned, origami, wrapping paper, or even a paper grocery bag.
- Scissors
- One writing utensil of your choice: a marker, pen, pencil, or crayon.
- One straw per person. Any kind of straw: paper, metal, glass, or plastic.
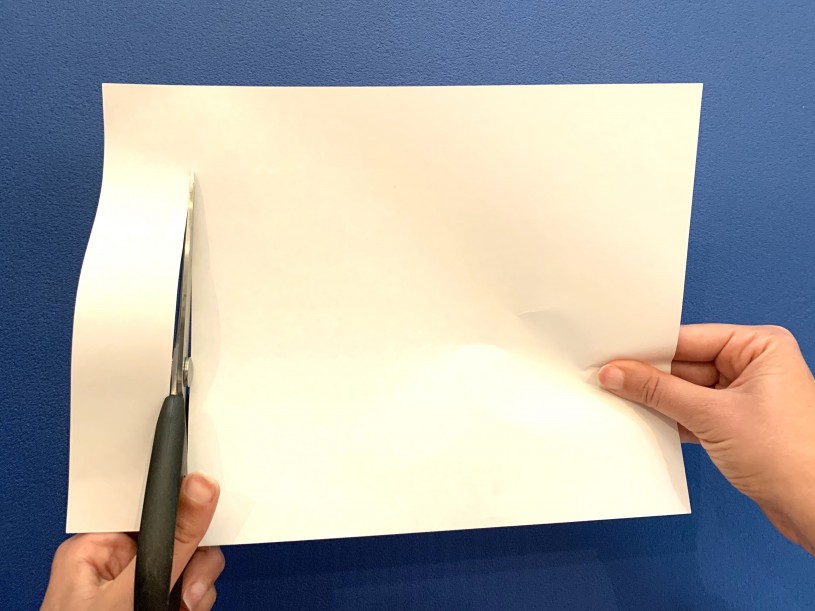
2. Cut your paper into 1.5 inch strips. This does not have to be precise for the craft to be successful. Using an 8.5’’ by 11’’ piece of white paper, turned horizontally, you can make 6 caterpillars. Note: I’m left handed so the picture of this step shows me cutting the left side of the paper with scissors in my left hand. Please use whatever hand is most comfortable for you.
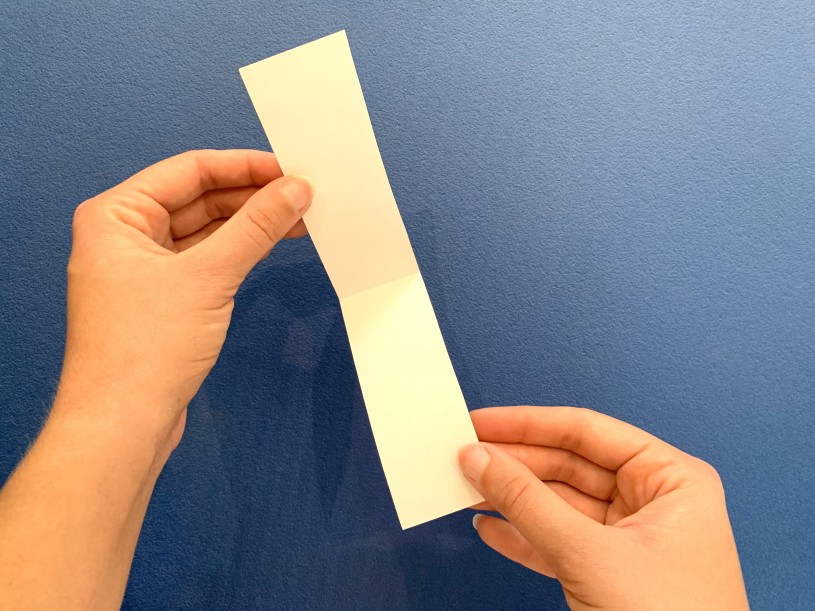
3. Fold your strip of paper in half, crease it, then unfold.
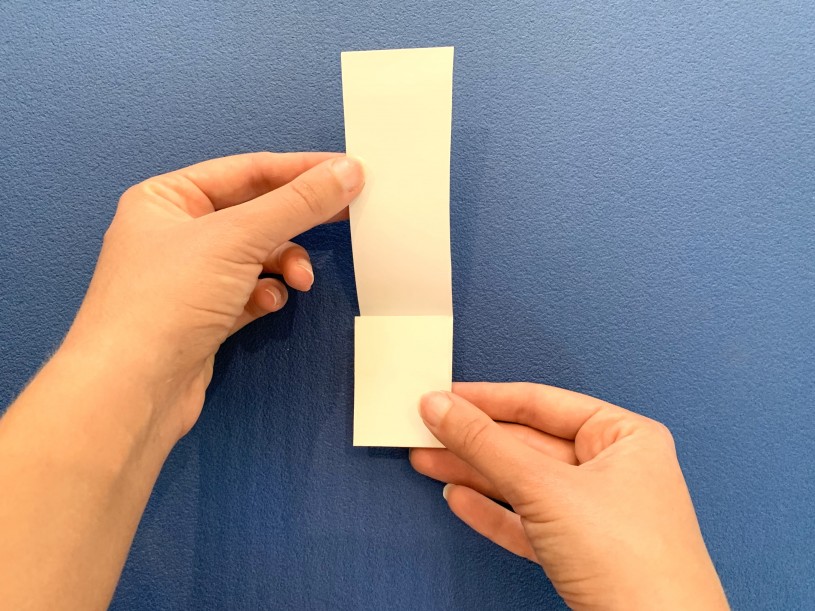
4. Fold one side of the strip in half.
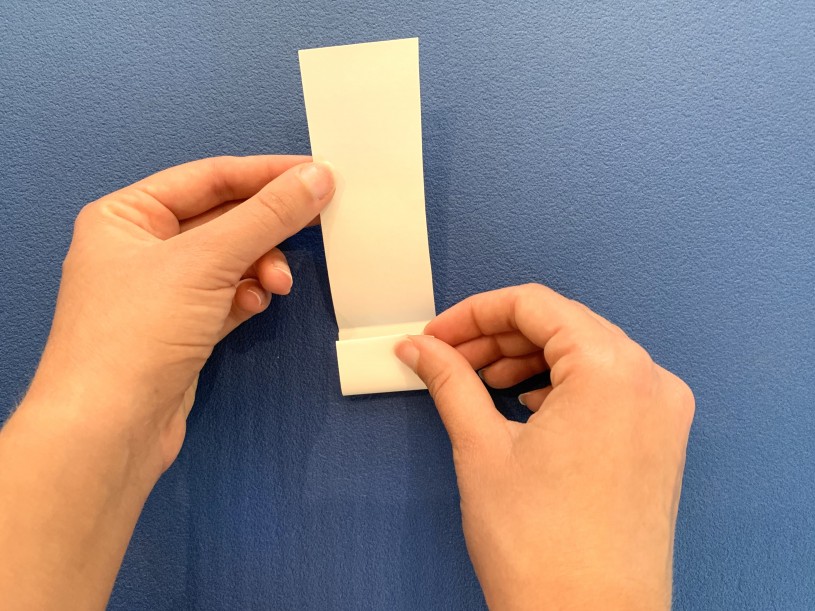
5. Fold the same side in half again, keep folded!
6. Repeat on the other side.

7. Fold two halves together, press to make sure everything is good and creased.
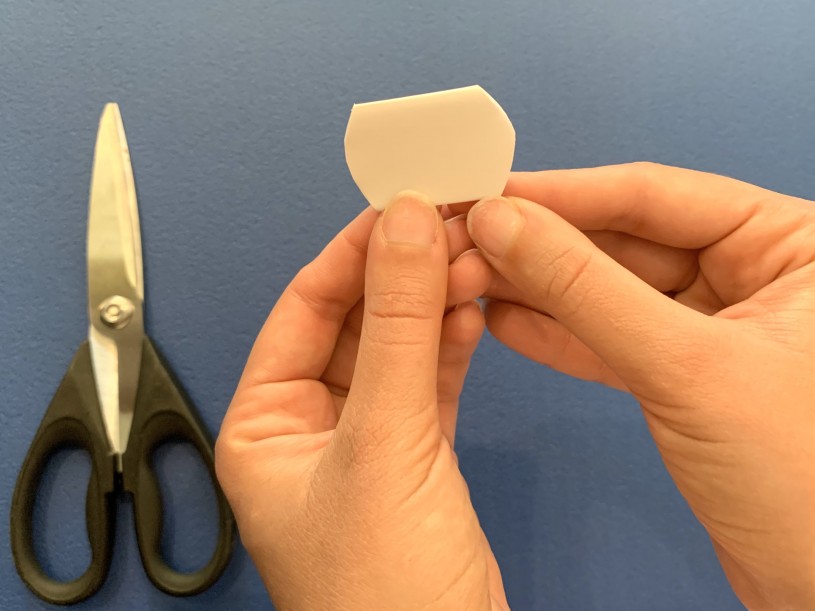
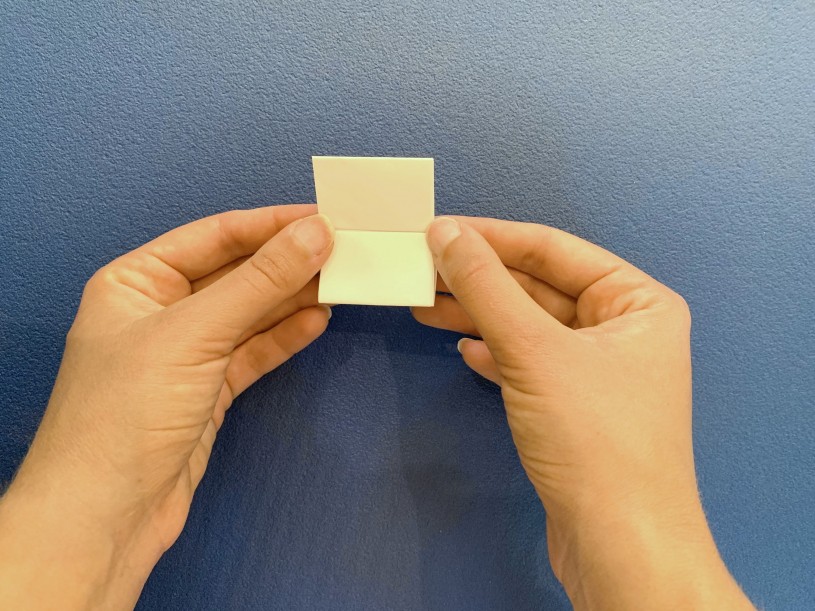
8. Cut all four corners so that the left and right sides are curved.
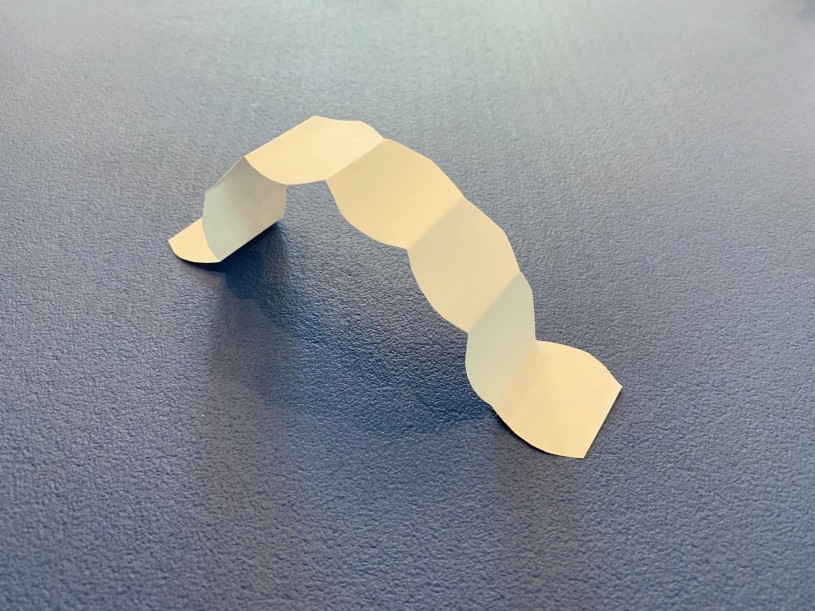
9. Unfold everything.
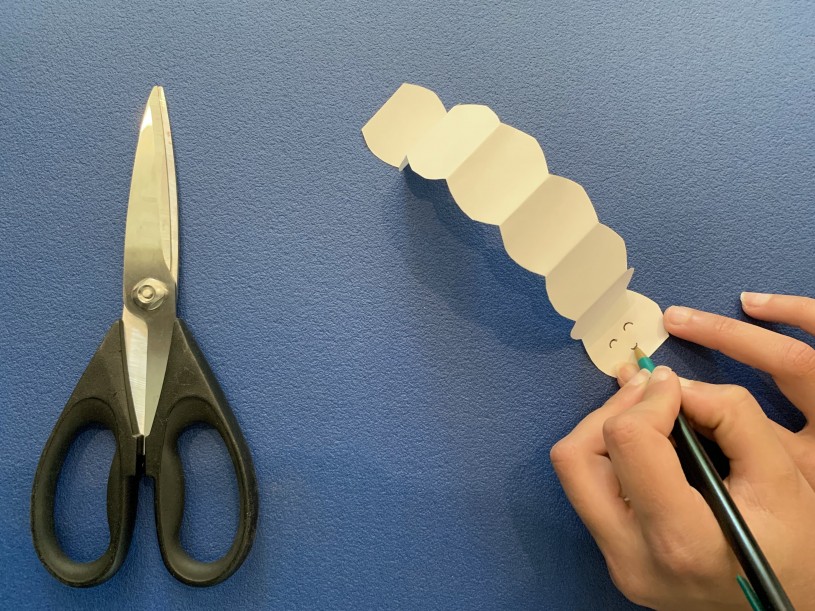
10. Draw a face on either end.
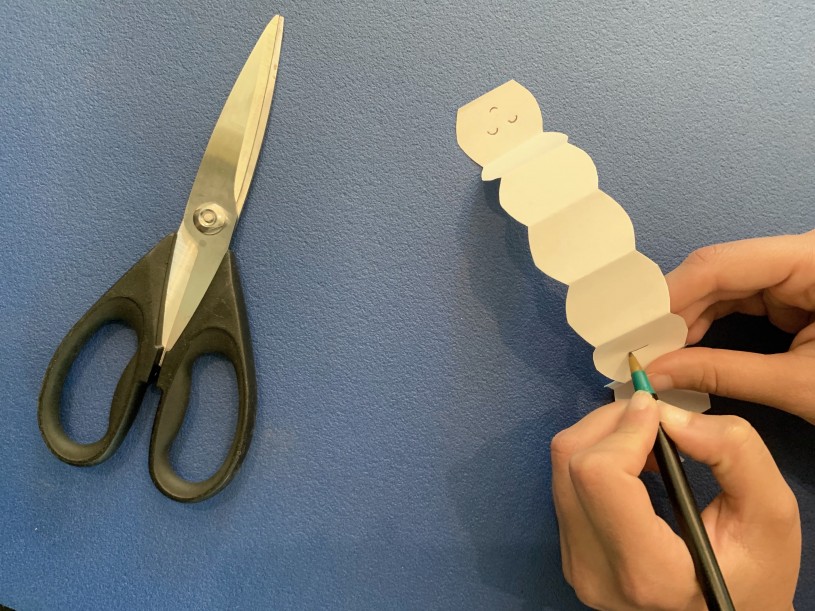
11. Draw a shape on the 3rd section from the bottom (the opposite end from the little face you just drew). Any shape will work: heart, star, triangle, circle, square, etc.
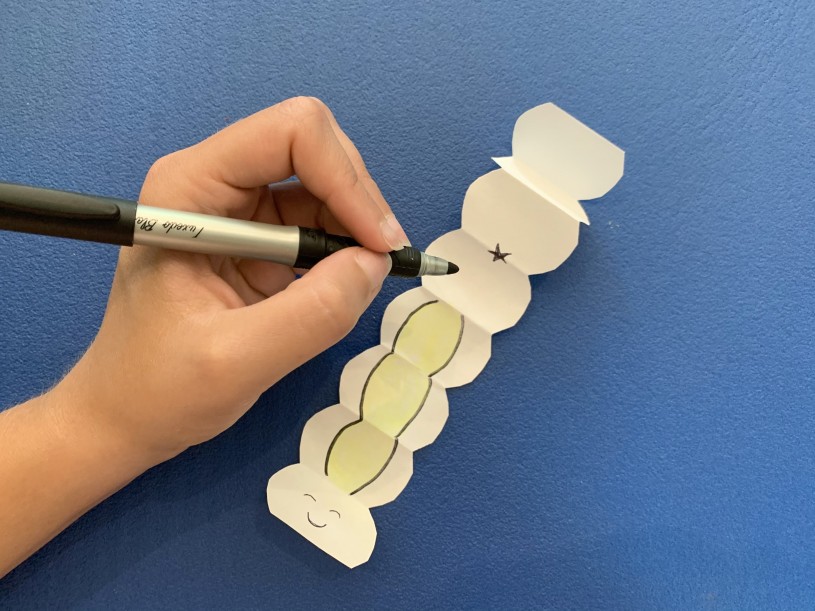
12. Decorate your caterpillars! A few things to keep in mind: you can use whatever materials you have at home but lighter materials tend to work better and help the caterpillar be able to race (markers seem to work better than crayons). Remember, you can also leave your caterpillar blank. No matter how you decorate your caterpillar, make sure you can still see the shape you drew after decorating!
- For older kids: look up a picture of a caterpillar that lives in your area and decorate yours to match!
- For younger kids: draw whatever you want!
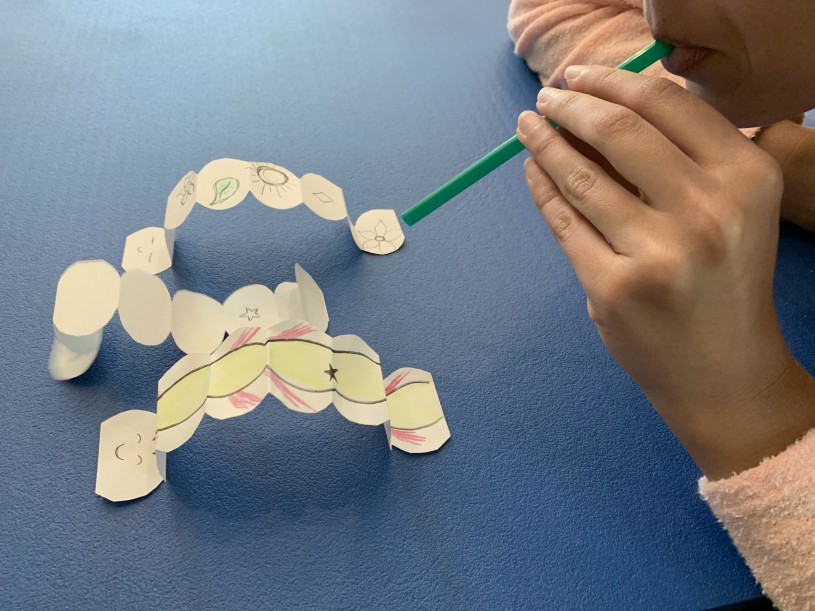
13. Your caterpillar is ready to race! Stand your caterpillar back up and blow on the shape with a straw to help it move!
- Grown-ups, it might be helpful to re-fold your little one’s caterpillar after they decorate it to help the caterpillar stand up better.
- If you have paper or plastic straws, you can cut them into two or more pieces to make sure you have enough for everyone.
- What if you don’t have a straw? No Problem! Follow these steps to make one: wrap a piece of paper tightly around the pen or marker you used to draw on your caterpillar, secure paper with tape, and slide off. The tighter you wrap the paper the better!